Before you read, please know this is an UNPAID, UNREQUESTED, UNSPONSORED blog post review on this item. I receive ZERO commissions or payouts from you purchasing this product whether you use my discount code or not and I have no benefits of you purchasing it. I’m simply sharing it with you because It’s just that good!! Also, click the pic below to be directed to my YouTube channel to watch a “How-To Video” on applying!
If you know me, you know I will preach until i’m blue in the face on staying out of the sun 100%. I am such an avid believer in protecting our body from the sun’s harmful rays and I will be this way forever. I mean, my daily makeup is a tinted SUNSCREEN and an SPF 55 powder on top you guys. I play no small games with my skin.
So when I came across Get Into The Limelight, I knew I had to check them out. I had heard other bloggers and Celebs rave about their products and felt like I had to get into the mix. So being the adventurous person I am, I reached out to to the page and low and behold it showed up to my doorstep the next week. And I immediately went to applying.
Before I get into that, I want to talk to you guys about why I even decided to give this brand new self tanner a try. Vegan, Paraben Free, Sulfate Free, Not Tested on Animals and Made in the USA. Should I continue? It has AMAZING ingredients and it’s safe to put on breast and breastfeed a baby, WHOA! I was blown away, or so I thought. And then I put it on.
So a little 411 on how I personally prep myself for self tanners; I shower and exfoliate my skin fully using a loofa or a spongelle sponge and i’m sure to get my elbows, knees. ankles and hands really well. I get out, dry off and apply a thin coat of my favorite lotion, Bum Bum cream by Sol De Janerio, and then I apply moisturizer to my face. I always focus on areas that self tanners tend to stick to more, like elbows and knees and feet and hands. This always makes my tans come out super even!
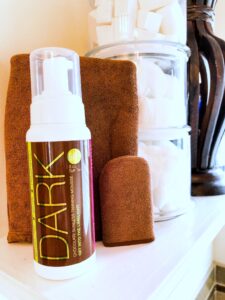
My initial reaction was that the bottle size was a good bit larger than any other brand self tanner I had used, a whole 2 oz bigger if i’m honest. Which breaks down to about 4 full body tans based on how much product I used to get a full body tan. The mitts that come with the starter kit were perfect. They were both super thick but not so much that you couldn’t get your product rubbed in, but thick enough that your hand inside the mitt was protected from product. And the best part, NO SMELL. No yucky fake tan smell. What is this black magic stuff?
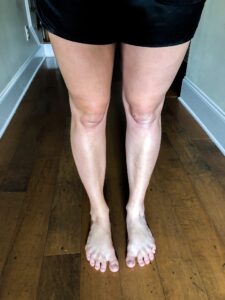
Applying product was a breeze! Like i’m talking my 3 year old could apply this stuff. 3 pumps to my entire leg ( 1 upper thigh, 1 lower) and 1 pump for each arm, 1 pump for stomach and 1 pump for my back. That’s all it took for my entire body. Less than a 1/3 of what I was using when using competitive products. I also noticed the product dried quick, but not so quick that it left streaks, but quick enough that I never felt sticky or like I needed to go sit in front of a fan naked. The color guard (which helps you see where you have and have not applied the tanner) was dark enough to give me exactly where I needed to put the tanner, but not so dark that I couldn’t throw on a loose fitting outfit and run out the door if I needed to. All in all, it took me about 5 minutes to apply this to my entire body. Pic below shows the color guard after immediately applying to the left leg.

The face was a breeze. The starter kit comes with this super tiny face mitt and it made applying the tanner to my face so much faster and easier. 1/2 a pump on each side of my face, rubbed all the way into the hair line, over closed eyes, over my ears and down into my neck and done. THAT SIMPLE.
One thing I will share with you on how I set my self tanner, is I take the back side of the mitt that has no product and I will gently press the product into my skin while still damp. This gives the product a more even coverage and sets it into the skin beautifully. I picked that up from watching way way too many youtube videos on self tanning! But it works, and I always do it.
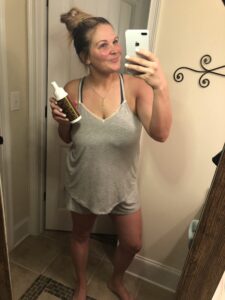
So my day after applying the tanner was this- Took a ton of collaboration pics for brand work (fully clothed in 2 different outfits), took a nap with my infant in white sheets (which by the way, ZERO stains on my sheets not even 2 hours after applying this stuff), nursed that infant without the product transferring to his skin. Then I finally showered it off about 6 hours later. Directions say you can leave it on for 8 but I was being cautious. The color did not fade, it stayed in place and I had zero wonkey spots to fix. I was so SHOOOOOK! This has magical powers in there somewhere.
The next 5 days, each night was spent taking a bubble bath in epsom salt without any product fading. My normal every night skincare routine was done without any issues (which by the way, no breakouts on my face), and I never once felt like I had to touch up any areas. So I finally decided to reapply the product tonight about 5 hours ago and I am again, blown away. I washed it off after only 3 hours this time simply because I wanted to see how the color would fade by only leaving it on half the time I did the first time, and the color still looks gorgeous. I have an Olive undertone and am very very pale skinned, but this color is GORGEOUS on me. My Instagram DM’s have blown up with people asking about it and i am SOOO excited to finally share with you! So head on over to the website by clicking the picture below, Grab the starter babe kit and use code JORDANLEE5 to make your entire kit, 8 oz bottle of Dark tan and both mitts, only $39 and free shipping.
Can’t wait to see all you’re glowing faces! XOXO-Jordan Lee


You had me at breastfeeding safe!